Sale


Raj Green Porcelain 600×900 (20mm) 21.60 Sq.m.
Original price was: £25.50.£19.50Current price is: £19.50. + VAT
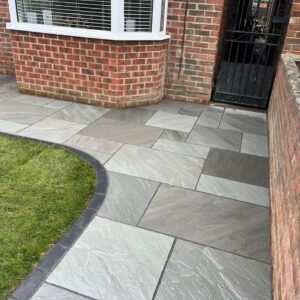
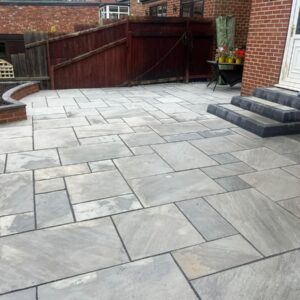
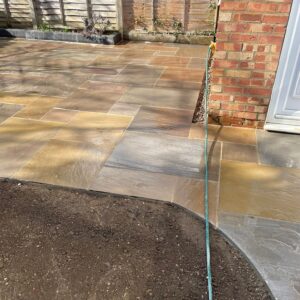
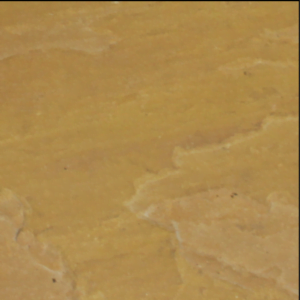
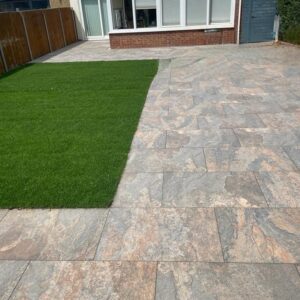
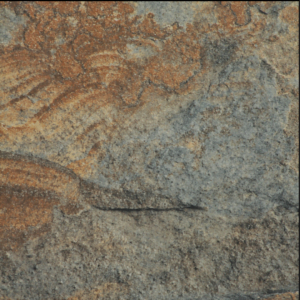
Raj Green Porcelain is a high-quality porcelain tile that is designed to look like natural Raj Green sandstone. This tile has a beautiful, earthy green and brown colour palette that mimics the natural variation found in Raj Green sandstone, making it a popular choice for those who want the look of natural stone without maintenance.
Price Mentioned is for 1 Pallet Equivalent to 21.60 sq.m.
Price Mentioned is for Crate
Raj Green Porcelain is a high-quality porcelain tile that is designed to look like natural Raj Green sandstone. This tile has a beautiful, earthy green and brown color palette that mimics the natural variation found in Raj Green sandstone, making it a popular choice for those who want the look of natural stone without maintenance. Made using advanced manufacturing techniques, Raj Green Porcelain is a dense and highly durable tile that can withstand high-traffic areas, making it ideal for both residential and commercial spaces. The tile has a matte finish, giving it a smooth and modern appearance, making it easy to clean and maintain. Raj Green Porcelain is easy to install and can be used for a variety of applications, for outdoors. Its versatile and timeless design makes it a great choice for any style, from traditional to contemporary.
Raj Green Porcelain Paving
- ✅ R11 Non-Slip Rating
- ✅ Low Maintenance
- ✅ Stain, Scratch & Shock Resistant
- ✅ Hard-Wearing & Highly Durable
- ✅ CE Approved
Raj Green Porcelain Paving is designed to mimic the beauty of natural stone, featuring a range of tones and a surface that replicates a naturally riven texture, while offering all the advantages of modern, vitrified paving. The lightly textured, non-slip surface ensures added safety, making it ideal for family gardens and larger commercial projects by maintaining grip even when wet. The R11 non-slip rating makes these porcelain slabs suitable for patios, pathways, driveways, and areas around swimming pools or water features. Outdoor porcelain paving is extremely robust and long-lasting, with a stain and scratch-resistant surface, making it the perfect low-maintenance option. The non-porous slabs prevent moisture buildup, reducing the risk of moss or algae growth. No need to worry about heavy rain or spills—these tiles can be easily wiped clean with a damp cloth, saving you time and effort. Additionally, porcelain’s resistance to fading ensures that the slabs retain their original color, even under intense heat and sunlight during summer months.
| Delivery | Free delivery available to most mainland UK. Delivery fee will be charged outside free delivery areas. See our delivery section for more information. |
| Texture | R11 Matt Anti-Slip |
| Thickness | 20mm |
| Handcut Sizes | 600x900mm |
| Pack Size | 21.6 m2 pack contains 40 slabs; 15m2 pack contains 28 slabs; 12m2 pack contains 22 slabs; 10m2 pack contains 18 slabs; 8m2 pack contains 14 slabs; 5m2 pack contains 9 slab. The quantity will vary depending on pack size. |
| Weight (kg) | The full pallet is 1000kg |
| Coverage | 21.6m2 the full pallet (gaps are not included) |
| Material | Vitrified Porcelain / CE Certified |
- 1 Slab = 0.54 Sq.m.
- Total Pallet Size= 21.60 Sq.m.
| Dimensions | 21.60 cm |
|---|---|
| THICKNESS | |
| SIZE & PACKS |
- Surface preparation: Ensure that the surface to be tiled is clean, dry, and level. Any irregularities in the surface may cause the tiles to crack or break, so make sure to address any issues before installation.
- Measure and mark: Measure the area to be tiled and mark the centre point of the room. Use a chalk line or laser level to create a grid pattern that will guide the installation process.
- Dry lay: Before installing the tiles, dry lay them on the surface to ensure a proper fit and to get a sense of the overall pattern and layout. This step is particularly important when using large-format tiles.
- Apply adhesive: Apply a thin layer of adhesive to a small section of the surface using a notched trowel. Work in small sections to ensure the adhesive remains tacky.
- Install tiles: Starting at the centre point, lay the tiles in the desired pattern, using tile spacers to ensure even spacing between tiles. Press each tile firmly into the adhesive, being careful not to slide them out of place.
- Grout: Once the tiles have been laid and the adhesive has been set, remove the tile spacers and apply the grout to the joints using a rubber float. Work the grout into the joints and wipe away any excess with a damp sponge.
- Seal: Once the grout has dried, seal the tiles and grout using a high-quality sealer. This will protect the tiles from stains and make them easier to clean.
- Allow to cure: Allow the tiles to cure for at least 24 hours before walking on them or placing any heavy furniture on them.
Related products
- Outdoor Porcelain
Kandla Grey (22mm) Sandstone Mixed Patio Size 18.19 sq. mt.
Original price was: £22.20.£19.50Current price is: £19.50. + VATOur high quality Kandla Grey Sandstone Paving Slabs are truly an unparalleled choice, delivering a perfect mix of versatility, aesthetics and practicality.
- Outdoor Porcelain
Rippon Buff. (22mm) Mixed Patio Pack Size 18.19 sq.m.
Original price was: £22.20.£19.50Current price is: £19.50. + VATRippon Buff sandstones strike the perfect balance between vibrancy and earthiness. Their warm and lively colours breathe life into your outdoor spaces while maintaining a connection to nature.
Product Specification:
600×900=16
600×600=16
290×600=16
290×290=12
Total=18.19 Sq.m. - Outdoor p
Rust Slate Porcelain 600×900 (20mm) 21.60 sq.m.
Original price was: £25.50.£19.50Current price is: £19.50. + VATRust Slate Porcelain Tiles bring the warmth and texture of natural slate to your outdoor area without the maintenance hassle. These tiles feature earthy tones and rich textures, providing a rustic and Inviting amblence.
- Outdoor Porcelain
Kandla Grey (18mm) Sandstone Mixed Patio Size 20.70 Sq.m.
Original price was: £20.40.£18.50Current price is: £18.50. + VATIntroducing the Kandla Grey Sandstone Mixed Patio Size, a versatile and timeless natural stone option for creating stunning outdoor spaces. This patio pack features a mix of square and rectangular pieces in varying sizes, providing endless design possibilities and flexibility in creating your dream patio.
- Outdoor p
Kandla Grey (20mm) Porcelain 600×900 – 21.60 Sq.m.
Original price was: £24.50.£19.50Current price is: £19.50. + VATKandla Grey Porcelain is a high-quality porcelain tile that mimics the natural look of Kandla Grey sandstone. With its subtle shades of grey and natural stone-like texture, this tile is a great choice for those who want the look of natural stone without maintenance.
- 1 Pallet = 40 Slabs
- 1 Slab = 0.54 Sq.m.
- Total Pallet Size= 21.60 Sq.m.
- Outdoor p
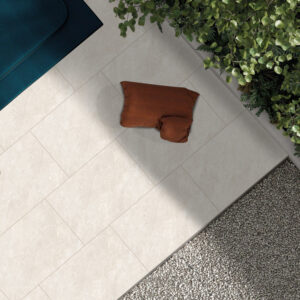
Quartz White Porcelain 600×900 (16 MM) 28.08 sq.mt.
Original price was: £25.50.£19.50Current price is: £19.50. + VATQuartz White Porcelain Tiles are the epitome of clean and crisp design. These tiles reflect natural light beautifully, making your space feel more open and inviting.


Reviews
There are no reviews yet.